Sage Export Routines
Before a Sage export can be carried out, this needs to be configured within Autowork Online. To do this select Database > User Options > Sage.
If Sage has never been used before, seek advice from the Helpdesk before starting as problems might occur.
Although Sage is enabled, sales and purchase invoices and credit notes can still be paid off in Autowork Online – they will however, enter Sage as unpaid.
Hint
Sage export files will be downloaded from the Autowork Online server to your PC. Create a folder called Sage Export on your desktop to hold these files prior to importing into Sage.
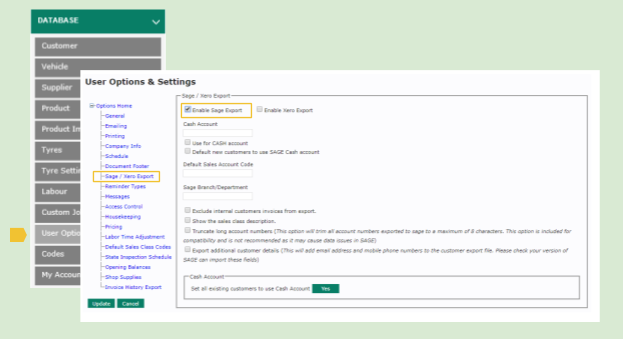
Before a Sage export can be carried out, Sage export needs to be set up by entering a tick in the Enable Sage Export box.
Select the Cash Account to use for Cash Accounting and decide whether to include or exclude internal invoices.
Exported transactions can be set to show nominal or job information.
You also have various other options that can be set in this screen.
Set the cash account number that is used in Sage so that invoices are posted to the correct account.
Exclude internal invoices from the export.
Truncate long account numbers so they are compatible with Sage.
Export additional customer details.
Set all customers as cash.
Please contact the helpdesk if you have any questions regarding these options.
Select [Update] to save changes.

Autowork Online will, by default, export all accounts into Sage.
If the Sage Cash Account is to be used, any accounts not required to be created in Sage need to be flagged in the Customer creation screen > Use Sage Cash Account.
All customer account codes flagged will not be created in Sage and instead the transactions will be allocated to the default Cash Account code.
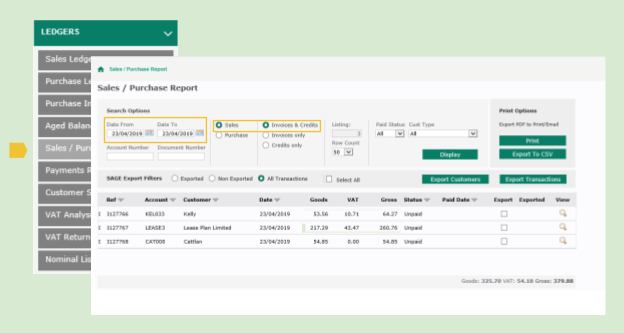
If the Sage link is activated, additional options such as [Export Customers] [Export Transactions] will be added to the Sales/Purchase report screen.
The default date range is set to display from Today to Today. To view older information, change the From date back and select the [Display] button again.
If the Sage link is activated, additional options such as [Export Customers] [Export Transactions] will be added to the Sales/Purchase report screen.
To create the .csv files for Sage import, choose a date range to view and select [Display].
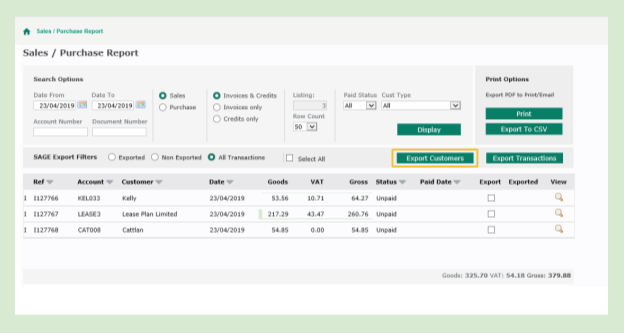
First, select [Export Customers] to export all the customers for the specified range. This action will create the Sales.csv containing all the customer details to be exported and produce a downloadable file for import.
Save this file to your required location.

If saving to the desktop, select desktop > the required folder > open.
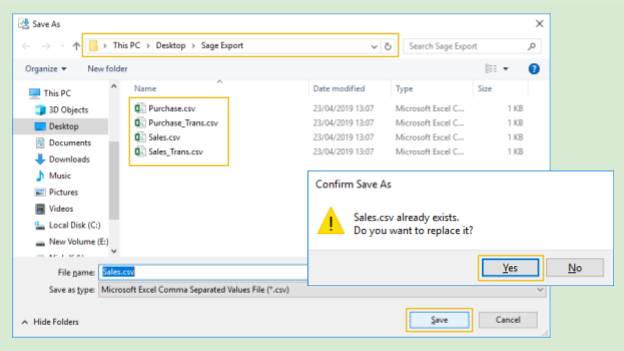
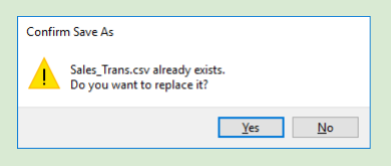
Once the folder is opened, select Save. If this is not the first export, you will be prompted to overwrite the existing file > Yes.
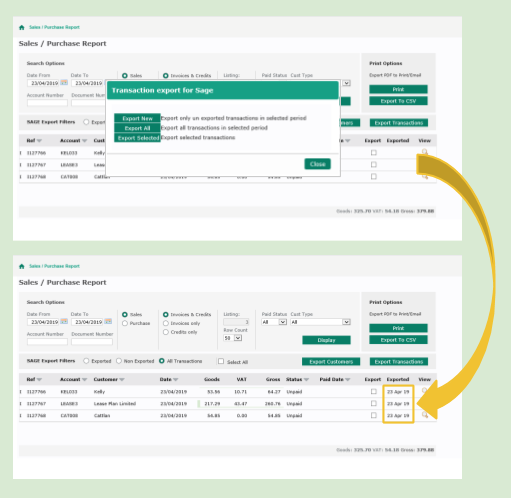
Once the customers are exported, select [Export Transactions] to download the invoice nominal transactions for the exported customers. This step will offer 3 options.

[Export New] Exports previously unexported information
[Export All] Exports all in range, even if exported before
[Export Selected] Exports lines that have been manually ticked
These actions will create the Sales_Trans.csv containing all the nominal details to be exported and produce a downloadable file for import.
The exported invoices will be date stamped at this point.
Save this file to your required location.
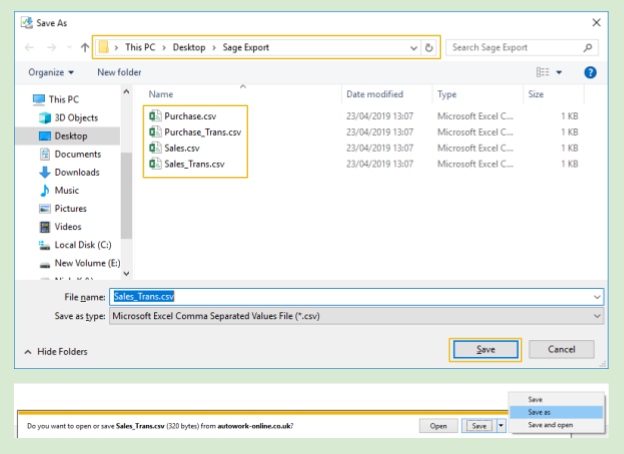
If customers have just been exported, the save box should open from the last point.
Once the folder is opened, select Save. If this is not the first export, you will be prompted to overwrite the existing file > Yes.