Using Warranty accounts
A warranty accounts feature has also been introduced. In the same was as setting a customer account as a fleet owner, you can now set a customer as a Warranty Provider. You can then flag a job as a ‘Warranty’ repair and select the provider.
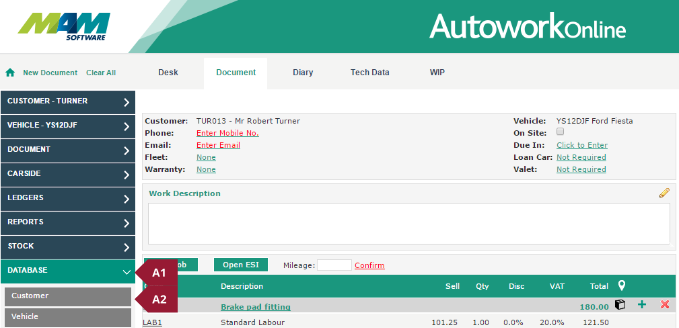
- Click the Database menu (A1), and then the Customer sub-menu (A2)
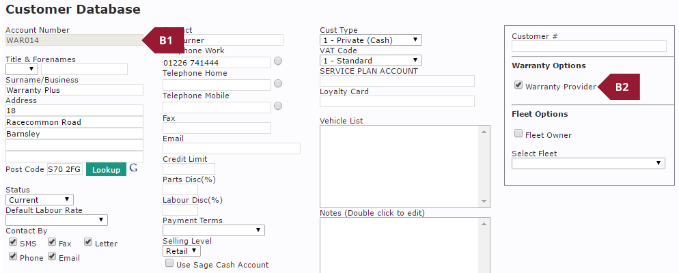
- Enter the customer you would like to use as the Warranty Provider (B1), then check the Warranty Provider checkbox (B2). Click the Update button to save changes.
A document can then be flagged as a warranty job using the following process:
- Click the Warranty entry in the customer details section of the Document screen

This will open a menu allowing the following options:
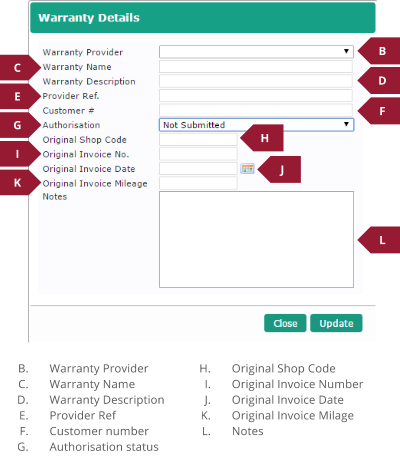
- Select a Warranty provider and record any details you need to in the fields as appropriate, then click the Update button. Build the job as normal.
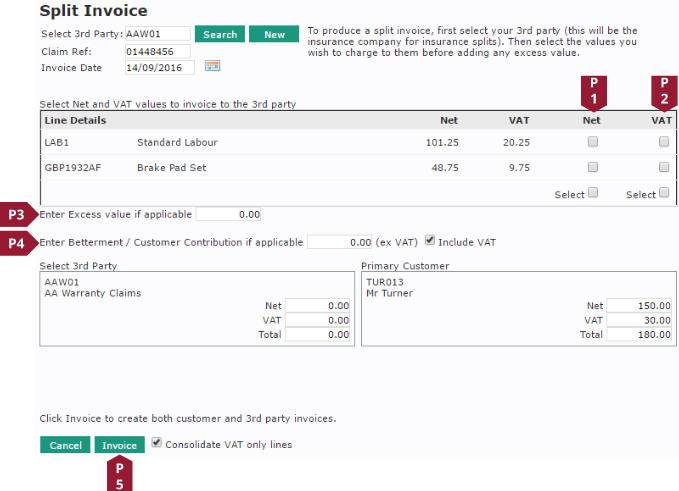
- When the Invoice button is clicked, a prompt asking if you would like to split the invoice will pop up. If the Cancel button is clicked, the invoice will be raised as normal, if the OK button is clicked, this will open the Split Invoice screen and set the warranty provider as the 3rd party automatically.
- From here you can select which items to charge to the warranty provider (P1) and (P2) . Set an excess (P3) and Customer Contribution (P4) if required. Once all the values are correct, clicking the Invoice button (P5) will generate two invoices, one for the customer, and another for the warranty provider.