Using Fleet accounts
The way that fleet accounts work has also been improved, rather than being able to specify any customer as the fleet owner, specific customer accounts must be flagged as a “fleet owner” in order to select them. This is done as follows:
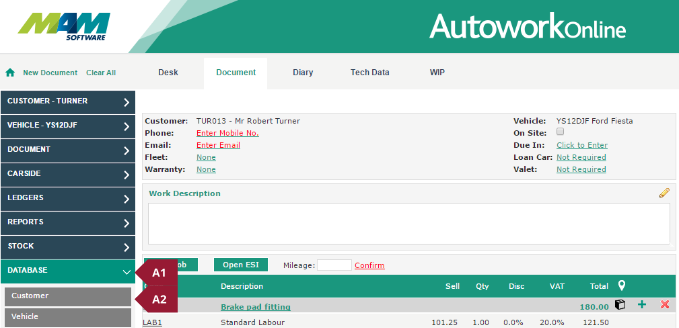
- Click the Database menu (A1), and then the Customer sub-menu (A2)
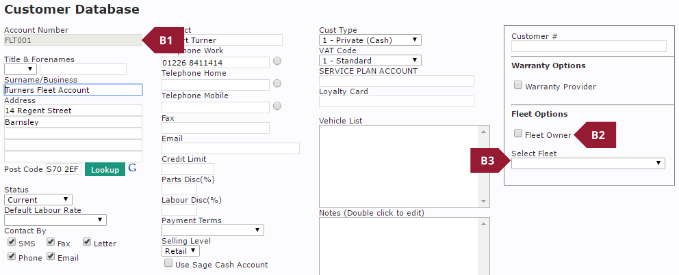
- Enter the customer you would like to use as the fleet owner (B1), then check the Fleet Owner checkbox (B2). On other accounts, you can now select the fleet owner from the dropdown menu (B3) to make them belong to this fleet owner, a customer reference (used by the fleet owner for the customer) can also be set in the Customer# box, this can be used for the fleet company’s own account numbers and can be searched on. Click the Update button to save any changes.
When selecting a customer who belongs to a fleet, this will be shown on the document screen. It is possible to set or change this relationship directly from this screen. This is done by clicking the Fleet entry in the customer details section (A).

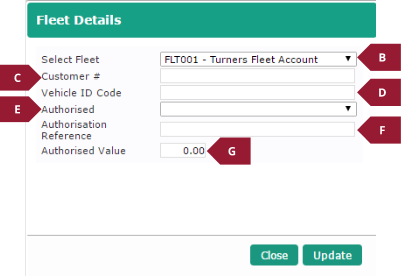
This will open a menu allowing the following options. As well as setting / viewing the customer’s fleet relationship, you can also record specific authorisation information for this job:
- Fleet account
- Customer number
- Vehicle ID Code
- Authorisation status (status codes are hard-coded)
- Authorisation reference
- Authorised value