Using deferred work
Benefits
- Reduce losses – defer work rather than simply delete it entirely
- Drive sales – automatically remind customers of their deferred work
- One a job group has been added to the document, and then either a job or estimate generated, clicking the Delete button (see the Job grouping screen elements explained section for details) in the job header will trigger a prompt.
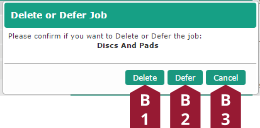
- In this prompt, clicking the Delete button (B1) will delete the whole job group, clicking the Defer button (B2) will defer the job, and clicking the Cancel button (B3) will not delete the item.
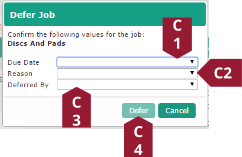
- Clicking the Defer button will cause a second prompt with several dropdown menus on it to pop up: Due Date (C1) sets the number of weeks to wait before sending a reminder to the customer, Reason (C2) sets the reason for the customer deferring the work (for example – a lack of funds), and Deferred By (C3) sets the operator who processed the transaction. Set all the dropdown menus to an appropriate setting, and then click the Defer (C4) button to defer the job group.
Adding a new code
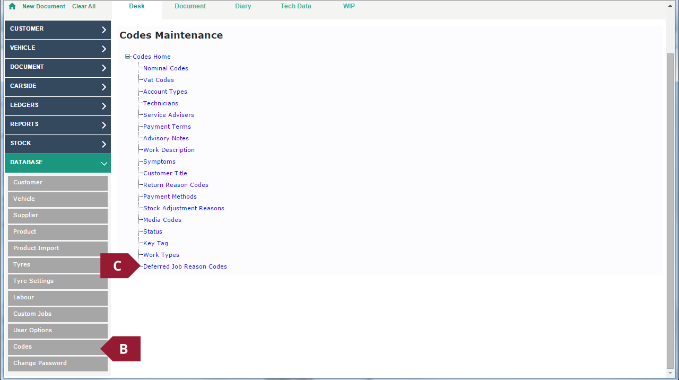
- Click the Database menu button
- Click the menu option for Codes
- Click the link for Deferred Job Reason Codes
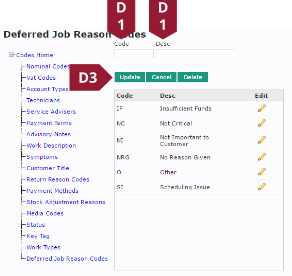
- Enter a code and description into the Code (D1) and Desc (D2) text fields respectively, then click the Update button (D3) to confirm the changes.
Modifying or deleting an existing code
- Access the Deferred job reason codes screen, as per steps A to C in the Adding a new code instructions
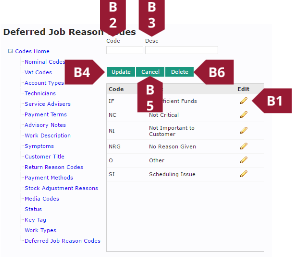
- Click the Edit button (B1) against the code that you would like to edit, modify the contents of the Code (B2) and Desc (B3) text fields, and then click the Update (B4) button to make the changes. Alternately, the Cancel button (B5) can be clicked to reject the changes, or the Delete button (B6) can be clicked to delete the code entirely.
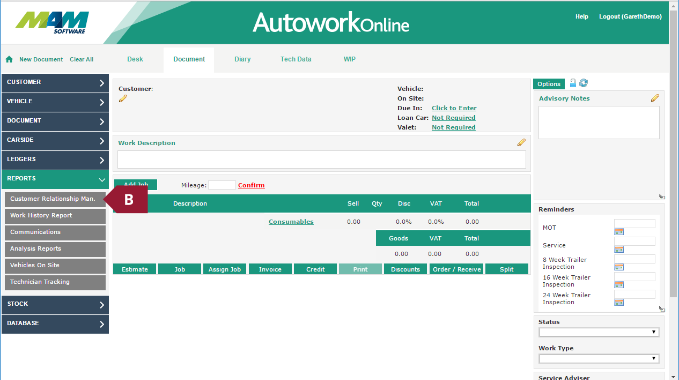
- Click the Reports menu button
- Click the Customer Relationship Man. menu option
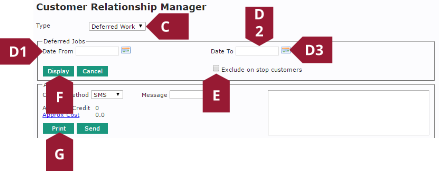
- Select the option for Deferred work from the Type dropdown menu
- Either manually enter a date into the Date From (D1) and Date To (D2) text fields, or click the Calendar button (D3) next to each field to set this using a calendar screen. Note that it is also possible to leave both fields blank, so that all records will be shown
- Optionally, check the Exclude on Stop Customers checkbox if required
- Click the Display button to display the report on screen.
- Optionally, click the Print button to print out the contents of the report
Exporting a list of deferred work
- Generate a deferred work report as per steps A to F of the Reporting on deferred work section.
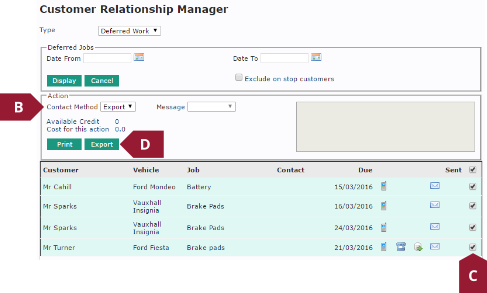
- From the Contact Method dropdown menu, select the option for Export.
- Check the checkbox in the Sent column for any customer you would like to export data for
- Click the Export button, this will generate and download a comma separated (CSV) file. This will most likely be in the Downloads folder, which can be found in My Computer (this may be called Computer, or This Computer depending on your version of Windows). The file should open in Microsoft Excel or similar when double-clicked.
- Generate a deferred work report as per steps A to F of the Reporting on deferred work section.
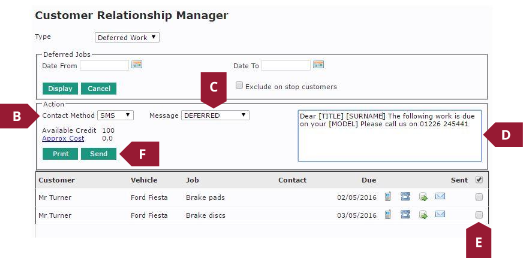
- From the Contact Method dropdown menu, select the required option. Please note that the Phone option simply notes that the customer has been contacted (see step F), as to avoid duplicate messages should you choose to contact the customer by phone.
- From the Message dropdown menu, select the option for DEFERRED.
- Optionally, amend the text in the Message text field. Note that any text in brackets ([]) will be replaced, for example, [SURNAME] will automatically be changed to the specific customer’s last name.
- Check the checkbox in the Sent column for any customer you would like to send a message to. Any customers with a checkbox already ticked have already been contacted, unchecking the box and then checking it again will cause the message to be resent.
- Finally, click the Send button to send the messages. Please note that the button will be relabeled as View when the Phone option is used, this will display a list of the customers’ contact details.
Viewing deferred work
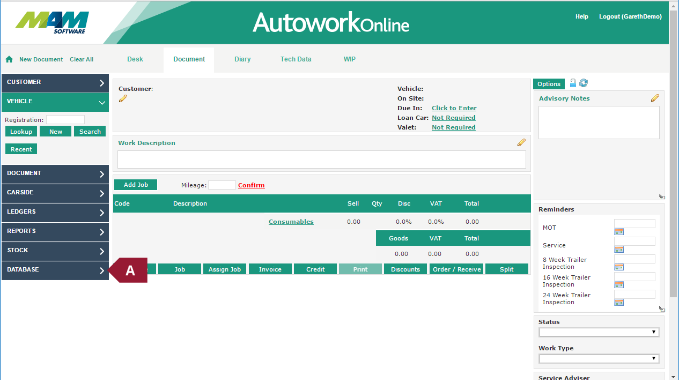
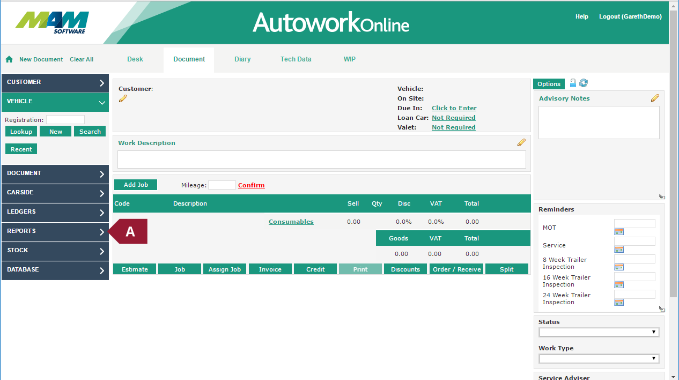
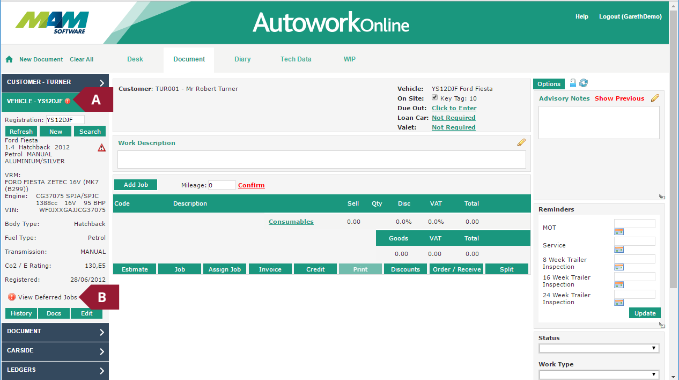
When a vehicle is entered where deferred work exists, the system will automatically prompt the user. An exclamation point (!) will show in a red circle on the Vehicle menu button to the left of the vehicle’s registration number (A). If the user then clicks the Vehicle menu button to expand it, a View Deferred Jobs link (B) will show at the bottom, beneath the vehicle details.
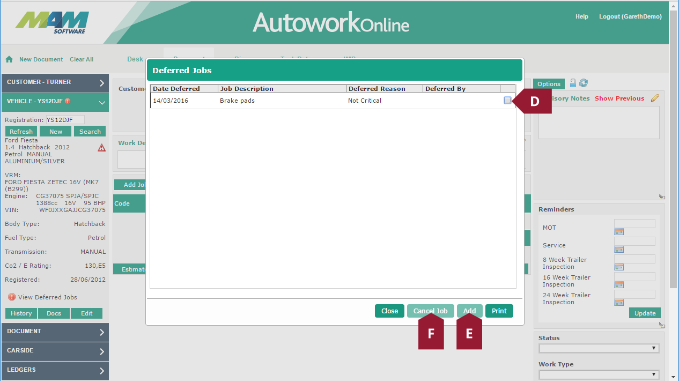
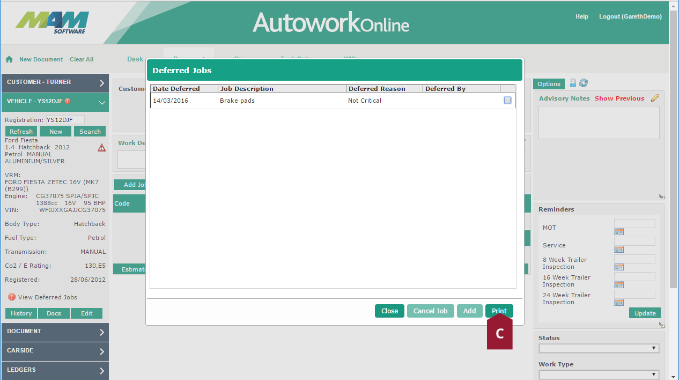
If the View Deferred Jobs link (B in the previous screenshot) is clicked, the Deferred Jobs screen will open, this lists the deferred jobs against that vehicle, including columns for Date deferred, the job description, reason code, and the technician who deferred the job. A list of current deferred jobs can be printed by clicking the Print button (C)
Recovering deferred work
To recover a job, simple check the checkbox for the particular job (D) in the Deferred Jobs screen, and then click the Add button (E), the items from the deferred job will automatically be added to a new document.
Deleting deferred work
There is also an option to cancel the job from this screen. This is done by checking the checkbox for the particular job (D) in the Deferred Jobs screen, and then clicking the Cancel Job button (F).