Valeting
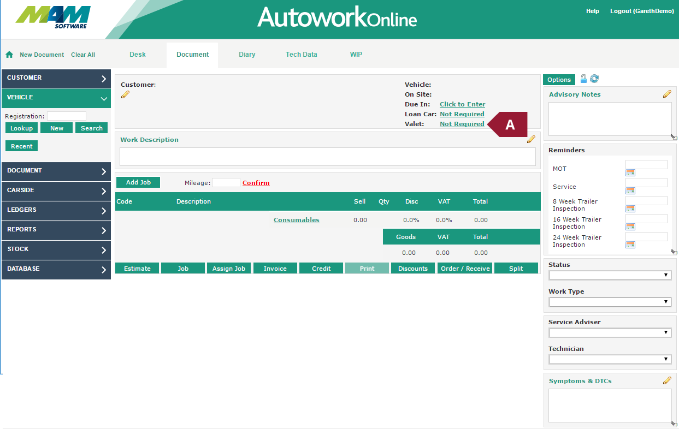
A new option has been added to the Document tab, which allows the user to add a valeting option against the customer’s vehicle.
Benefits
- Improved workflow – easily add valeting options from the document screen, and see current options at a glance
- Work in progress (WIP) screen compatible – automatically sort jobs awaiting valating into their own section in WIP
Valeting is added out as follows:
- From the Document tab, click the Not Required link to the right of the Valet heading. If there is already a valeting option on the document, the valeting option will display instead of “Not Required”.

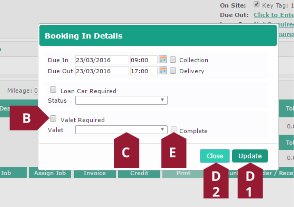
- Check the Valet Required checkbox.
- Select an option from the Valet dropdown menu.
- Click the Update button (D1) when you are happy with your entries, or the Close button (D2) if you would like to cancel.
- When you would like to note that the valet has been completed, open the valeting options screen using the instructions in step A, then check the Complete checkbox. Confirm the changes as in step D.

